Freestyle Refresher – Part 3: Using your arms in front crawl
Increase the efficiency of your catch and pull
It might seem strange that we only come to using your arms in front crawl in the third part of this course. After all, your arms are the main source of propulsion. However, propulsion is of limited use if you have poor body position, are unstreamlined and can’t breathe efficiently. Moreover, unless you are balanced in the water, you will find it difficult to properly control your arms. Try to practise what we covered in parts one and two of this series before moving on – but don’t despair if you are struggling. In practice, improving front crawl is an iterative process. You don’t just learn streamlining and balance and then add in your arms. You need to repeatedly review all the components of your stroke.
The premise of this refresher course is to help you improve your front crawl if you don’t have access to video analysis or a coach. Video analysis is often the most effective way to identify potential improvements but it can be expensive. We want to help you feel and understand how you swim so you can make improvements yourself.
Press back to move forward
In simple terms, to move forward in swimming, you must push water backwards. To go faster, you either have to reduce resistance, which we’ve looked at previously, or push back more water. There are two ways to do the latter: either cover more distance with each stroke or increase your stroke rate. It’s usually easier to start with making each stroke more effective so that’s what we’ll address here. Stroke rate will be covered in a future article.
Imagine pulling yourself out of a swimming pool – not a deck-level one, but one where the water level is 25cm or so below the side. Or, even better, do this next time you’re there. Facing the wall, put your hands on the deck, palms pressed onto the tiles, a little wider than shoulder-width apart. Your arms will be above your head, with a slight bend at the elbow. This is the position from which you can apply maximum force.
Now, lift yourself out of the water. Notice the strength comes from your chest and lats. Your elbows stay high. You will pass through a point where your eyes, hands and elbows are all at about the same level. You need to keep your elbows high in order to straighten your arms and lift yourself right up. You finish up with your arms almost straight, your hands by your hips, palms still facing down.
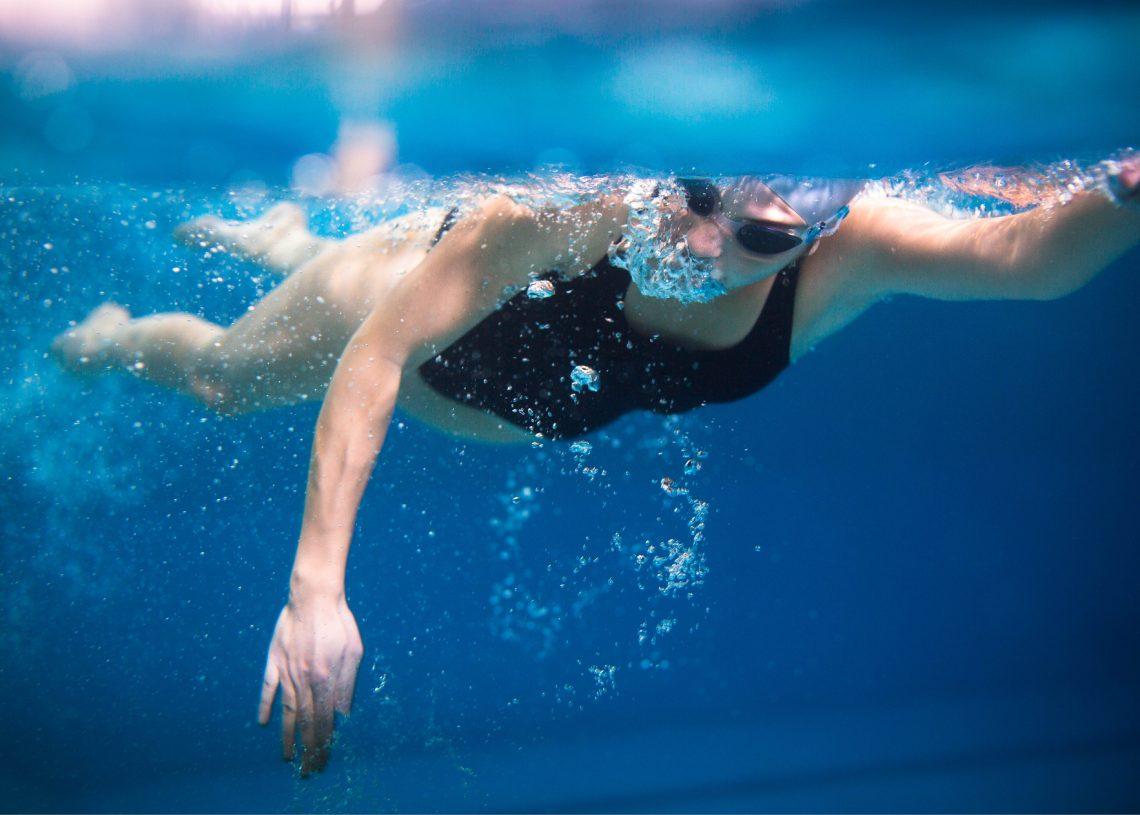
This, roughly speaking, is the way you need to use your arms in front crawl, amended for using them one at a time, and your body rotating and being horizontal rather than vertical. Imagine yourself locking your hands onto the water and levering yourself over the top of them through the water.
Now, there are lots of refinements you could get bogged down in (I find the topic fascinating) but try not to over-complicate it too soon. You will hear people talking about the catch (the first part of the stroke after the hand enters the water), curvilinear (rather than straight) hand pathways and ‘early vertical forearm’. But if your arms follow the movement pattern they do when hauling yourself out of the pool, you’ll be in a good place.
One at a time
A good way to practise is to swim slowly with one arm. Lie face down in the water with both arms above your head, shoulder width apart. Then try a few gentle strokes with one arm only. You could imagine pulling yourself along a rope that’s just below the surface. When you want to breathe, just stop or scull briefly and lift your head. Repeat with the other arm. While you don’t normally watch your hands while swimming, you can do so for this. Try to memorise how it feels.
While this exercise will get you started, it’s difficult to incorporate sufficient body roll when doing it, which is an important part of front crawl swimming. To progress, move to swimming continuously with both arms but make sure one arm completes a stroke cycle and returns to starting position above your head before starting the next. This exercise or ‘drill’ is often referred to as ‘catch-up’. While doing it, still pulling on your imaginary ropes (one for each arm), ensure you rotate from side to side – somewhere between around 30 and 45 degrees rotation on each side.
Don’t be a windmill
Another term you might hear is ‘front quadrant swimming’. This is the idea that rather than having your arms windmilling and 180 degrees apart, you should aim to always have one arm in front of your head. This means your right arm should start its catch and pull phase as the left hand enters the water, and vice versa. The catch-up drill above is an extreme version of front quadrant swimming making it a good place to start. Now, instead of waiting for one hand to ‘catch up’ with the other, start the stroke a moment sooner.
The recovery
The action of bringing your hand back from your hips, where it exits the water, to in front of your head, is referred to as the recovery. You will hear things like, ‘high-elbow recovery’ and ‘straight arm recovery’. These are topics for another time and an in-depth discussion. For now, concern yourself only with the ‘recover’ aspect. As you swing your arm back to its starting position at the front of your stroke, try to relax your elbow, forearm, wrist and hand. Give your muscles a moment to rest. I like to think of my arm being controlled by a puppeteer. Imagine your elbow being lifted from the water by a string and pulled forward while your forearm relaxes and swings gently.
Entry
Lots has been said and written about exactly how, where and when your hand should re-enter the water but keep it simple for now. What you need to do is slide your hand and arm into the water and set yourself up to begin the next stroke. Aim to spear the water with your fingertips a little in front of your head and in line with your shoulder. The rest of your hand, wrist and elbow follows through the same point, in that order, as if you are pushing your arm into a sleeve. Keep your elbow higher than your wrist and your wrist higher than your fingertips so that your palm is angled down and slightly backwards. Reach forwards (but not too much) and then begin the cycle again.
Getting it right
Knowing what to do with your arms is one thing. Doing it is a different matter. For one thing, for much of the time you cannot see your hand or arm, so you have to feel what they are doing. A key benefit of doing exercises and swimming slowly is that they help your proprioception. Do them slowly and stay focused for the most benefits.
The second issue is that your hands and arms don’t operate independently when you swim but react to other actions. For example, if you lift your head or turn it too far when you breathe, your hand and arm will tend to sweep out and press downwards to compensate. The more balance you have in your body, the more control you will have over your arms.
It’s impossible to cover everything about stroke mechanics in a short article. Moreover, there are differences and refinements that are contested and debated among technique experts. If you’re aiming for competence rather than world domination, you can safely ignore a lot of this. Watch videos of great swimmers as these are useful to learn from but you’ll see there are differences between them. You can go a long way by catching hold of the water and pushing it straight backwards. This will give you a strong foundation to build on.
Next time we will look at legs and the critical issue of timing.


